Saturday, December 21, 2013

12 Days of Christmas DIY Greeting Card

Posted by Vicki at Saturday, December 21, 2013 0 comments
Here is part 2 of my Graphics 45 Christmas card set! This one is themed with their '12 Days Of Christmas' paper that is new this year. I made this card similarly to the last one, so refer to that post for credits.


With this card I also used Martha Stewart punches to create the fence and leaf stems. The door comes from Poppystamps, which is such a great resource.


This card also included a lot of fussy cutting which I love to do. Can't wait to give this to someone!


Thursday, December 19, 2013

Secret Garden DIY Birthday Card

Posted by Vicki at Thursday, December 19, 2013 0 comments
 
 
As mentioned in my last post, here is my first card using a 'Secret Garden' theme. I gave this to a coworker for her birthday and she loved it! I absolutely love this style of card; so much fun to make!

Wednesday, December 18, 2013

The Nutcracker DIY Christmas Card

Posted by Vicki at Wednesday, December 18, 2013 0 comments


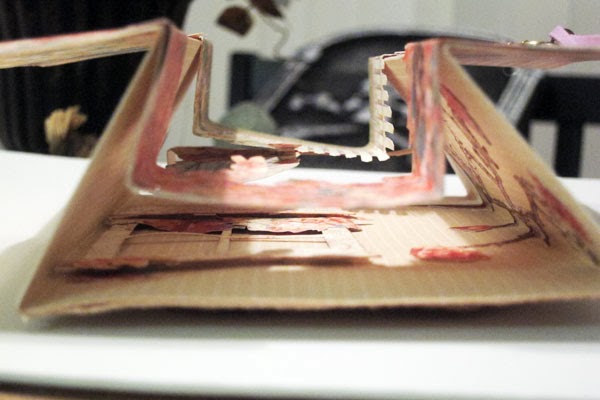
I have been making a ton of Holiday cards this year! Here is one of my newest, using some of my favorite papers from Graphics 45, their Nutcracker Suite series from last year. I have to thank Xannero1 for her wonderful creativity. I love her work and the structure of her cards.

My first card in this style was 'Secret Garden' themed (post coming soon!), so I decided to make some Christmas ones with the festive paper I had. I also used a lot of Glossy Accents to make 3-Dimensional aspects and it also works as a great glue!


In the back I included a pocket to stick a handmade note or other card elements. I tied it all together with some cute Christmas ribbon. Here's a look at the 3D up close!


Sunday, December 15, 2013

Nightmare Before Christmas Disney Paper Craft Christmas Ornaments

Posted by Vicki at Sunday, December 15, 2013 0 comments
 
 
One of my daughter's favorite Christmas movies is 'The Nightmare Before Christmas' - even one of our bathrooms is decorated with Jack Skellington! I got the idea for these guys coming out of Halloween crafting since I had some spooky black and white scrapbook paper still hanging around. I had also been seeing a few Jack ornaments popping up on Pinterest, so I decided to make my own!

I got the black snowflakes and tinsel last year on clearance and used them behind Jack to give some sparkle (I believe everything could have more glitter). I used my Sizzix circle die to make Jack's face out of foam and drew on his features with Sharpie. The decorative paper behind him is scrapbook paper - including some very pretty handmade paper I found on clearance a while ago at JoAnne's - and used tacky glue and hot glue to put it all together. The alternative version simply has two snowflakes overlapping each other.


Move over Halloween, its Christmas time!

Sunday, December 1, 2013

Paper Birthday Card - Boy's Muscle Car 16th

Posted by Vicki at Sunday, December 01, 2013 0 comments
This was my first attempt at making a birthday card for a boy! A friend at work requested one for her grandson and told me he liked cars. This was different from anything else I had ever tried to make, so it was a bit of a challenge to make it look interesting without it being 'girly'.

I also got the chance to use my new envelope maker.


Sunday, November 24, 2013

Harry Potter Paper Scrapbook Mini Book

Posted by Vicki at Sunday, November 24, 2013 6 comments
This is my first attempt at a paper bag mini book. I used pictures that my daughter took of the Harry Potter Studio Tour in London while she was abroad. I got the idea from watching tutorials by My Sisters Scrapper Vertical Paper Bag Mini Album Series many, many times! I took the Lego keychains I had laying around and attached them to the book for some extra decoration.


My big purchase for this project was the Crop-O-Dile which allows you to punch holes through almost anything!


I used a lot of different scrapbook paper, including leftover Halloween pages and other scrapbook accessories. There are a lot of hidden pockets, flip-up parts, and removable sections of the book so it holds 50+ pictures.

Overall it took about three weekends. It was a lot of fun and I can't wait to do the next one with more of her London pictures!


Friday, October 18, 2013

Easy and Quick DIY Halloween Party Invitations

Posted by Vicki at Friday, October 18, 2013 0 comments
I needed to make some quick invitations for a friend's party last week. On a time crunch and with a budget, I had to get a little creative! Luckily for her and me, I had a huge stack of recipe cards laying around as well as a handful of Halloween stamps I had been dying to try out.

I took a background stamp, inked it up really good, stamped it once to get some of the excess ink off, and then stamped it all over the recipe card trying to create a "shadowy" background. This helps add some texture to a relatively simple invitation.
Then I used one of my bargain witch stamps on a piece of card stock, colored in the yellow moon with pencil, cut a bigger circle out of black card stock to put around it and used dimensional dots to attach it to the recipe card. The 'You're Invited' stamp was also from the Michael's bargain bin. Beneath that I used an invitation stamp to allow my friend to write her party's details. I then backed it on some Halloween scrapbook paper and cut a decorative edge - you can also use edge punches here. You can add glitter (orange, black, or purple, etc) or embossing to any of the stamps for some extra oomph. Voila! Easy, cute Halloween party invitations using things I already had!

Sunday, October 6, 2013

Hand Made Halloween Greeting Cards

Posted by Vicki at Sunday, October 06, 2013 0 comments
Halloween is right around the corner, and I love handing out holiday cards at work. These two were made with holiday napkins, black card stock, and Halloween scrapbook paper that I had in one of my drawers. A lot of stores, such as Michaels, Walmart, Target, and places like Dollar Tree will sell reduced scrapbook paper packs, some as low as one dollar in the bargain sections. While these papers might be thinner than the 'premium' papers, they work great when adding some pop and color to DIY paper craft projects! When I'm paper crafting, I use a Fiskars paper trimmer to make sure I get clean and even lines - it saves a lot of time, and keeps my hands from hurting.

For the pumpkin card, I used silver embossing powder. With both cards I used my Xyron (as mentioned in my last post) to make stickers that could be mounted on several different colored squares. You can achieve some depth here by using dimensional glue dots. For the glitter lines on the inside of the alien card (below), I used double sided tape and some of Martha Stewart's glitter. I like using this glitter when crafting because of its fine consistency and how vibrant the colors are.


The next two cards were made using one of my favorite new stamps from Michaels which I got on sale a few weeks ago. With the first card (below) I stamped the haunted house directly onto the purple scrapbook paper background and darkened the embellishments (bats, trees) I knew I wouldn't cut out with with a pen. I then stamped the same stamp onto white card stock and cut it out so that I could glue it with a dimensional dot over the first haunted house stamp. I used black embossing powder and covered it with black glitter while still hot. I colored the windows in with colored pencil, and added in a moon stamped on yellow paper. The frame embellishment is thanks to a Martha Stewart edge punch, but you could achieve a similar effect with any decorative edge scissor.


This final card was done using basically the same technique. The silhouette of the kids and the tree was fussy-cut from a scrap book paper and glued on with dimensional dots. The bats are embossed with clear Versamark glue.


There you go! Some quick and easy Halloween greeting card ideas using things most of us have laying around in our craft drawers. Let me see some of the stuff you are making this year in the comments!

Toilet Paper Roll Halloween Treat Holders

Posted by Vicki at Sunday, October 06, 2013 0 comments
These are festive Halloween treat holders, made out of toilet paper rolls, bargain holiday napkins, and a few office supplies lying around the house. I used Mod Podge on the darker colored napkin rolls, but I found that the lighter ones looked better by simply wrapping them around the roll and attaching them with one seam in the back using Aileen's Tacky Glue. I used a box fold to close off the bottom and glued it to seal, while I left the top un-glued so that it can be opened and filled with sweets.

I got the idea of using the office clips to attach the treat holder "heads" from some projects on Pinterest that used them in scrapbooking. To keep the heads upright, I used plain white card stock as a backing. I did this by making that portion of the napkin a sticker by running it through my handy dandy Xyron. I love that thing! I invested in it about a year ago, and it's such a great tool for paper crafting.

The labels are attached with pipe cleaner "hands" and I used some bargain-bin Halloween stamps from Michaels. I get almost all of my stamps from here. They have some great finds in their dollar bins and clearance sections! I've just begun to experiment with embossing powders and I love the way they look - I'm sure I'll be using them a lot more often.

These do not stand up by themselves (as they are pictured), but I thought they could be used as gift embellishments or maybe even place settings at a holiday party.


Jubilee Crafts Template by Ipietoon Blogger Template | Gift Idea