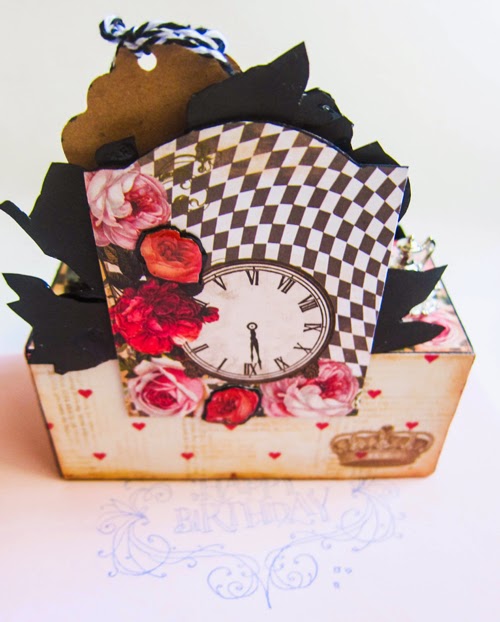
Tuesday, July 19, 2016

Kitty Cat Greetings

Posted by Amanda at Tuesday, July 19, 2016 0 comments
                Long time no post! I guess the older I get, the harder it is to work nights! I've still been crafting on my Saturdays, however. I've enlisted the help of my daughter to photograph what I've been working on and quite a few posts are queued now for the future.
On to the cards!

I was busy last month making some thank you cards for my daughter to hand out at her work. I decided to use these really cute cat stamps I just ordered – CoolCat Clear Stamp set by My Favorite Things from SimonSaysStamps. I've really fallen in love with stamping lately and I'm trying not to go crazy, but there are so many cute stamps out there! I try to buy stamps that I know I can use multiple times. I seem to be leaning towards clean design and I love the look of watercolor and colored pencils. There are some pretty (but pricey) watercolor sets out there but those may have to wait for Christmas! Right now I am using Recollections watercolor and pencils from Michaels. I feel like I've already learned a lot thanks to Youtubers using Tim Holtz distress inks. The colored pencils are Prisma from Walmart – 24pack at a pretty good price!


The gang is all together.


On the left: I really like how this turned! I cut cut a frame window from my Spellbinders pierced die rectangles and used a flower and vase from a Belle&Boo stamp I had gotten years ago.

On the right: I used the paw stamp in the set to accent the paper. I cut a circle with my Big Shot and a circle frame die from Sizzix. The pierced rectangle came from a Spellbinders die. The cloud paper was from my stash and the 'thanks' stamp is another one from the OTC company. Added a few star sequins and a bit of Wink of Stella on the clouds (new favorite!).


On the left: I love this kitty, it looks just like my rescued baby Noxie so of course I had to do her in black watercolor. The congrats stamp came from a set from Oriental Trading Company - they have quiet a few nice sentiment stamp sets! 
 
 Last but not least: This was my retro kitty - well that's how I saw her. The 'Thank You' also came from OTC and I just used half of a border stamp I had to make the shelf. Pop dot for the vase on the shelf. Pretty simple, and a little Wink of Stella on the pillow of course.
Simple & cute on the inside.
Hope you like! Can't wait to use these again.

Wednesday, August 5, 2015

Chalkboard Paper Mini-Album

Posted by Vicki at Wednesday, August 05, 2015 0 comments


I had a 6x6 Optimus paper by Prima and decided it would make a cute little book. I tried something new with short
pockets and I mostly like the way it turned out. I also used some patterned masking tape - I really liked using it. It was a great learning book; I got to try different techniques! I love the paper - Prima always has such pretty ones.

Here are a few pictures - this one had quite a few pages, flaps, and pull out cards so I didn't take pictures of them all.


Saturday, August 1, 2015

Handmade Spring Inspired "Thank You" Card

Posted by Vicki at Saturday, August 01, 2015 0 comments
I received this stamp free from Quick Cards Magazine some time ago, so I decided to make some cards with them while on vacation. I just stamped it in StazOn black ink and used some watercolor pencils and some Studio G glitter glue.

Stamp: Wild Rose Studio - Annabelle's Meadow


Wednesday, July 29, 2015

Handmade Paper Garden Card

Posted by Vicki at Wednesday, July 29, 2015 0 comments


These little cards I made from another stamp set I got from Quick Cards magazine for free! The background paper was made by me from pieces of scrap paper that I had; the images were stamped and embossed. I started with a bunch of Kraft cardstock bits and pieces and put them into squares - I love using all my scraps (as seen in my last post) because I feel less wasteful, lol! The silver brads are from Recollections.
I think these are too cute!


Saturday, July 25, 2015

Sticker Challenge - Panda Paper Craft Cards

Posted by Vicki at Saturday, July 25, 2015 0 comments

I decided to challenge myself and actually try to make something from some cute stickers I bought, rather than just adding them to my ever growing stash! I didn't have stamps or dies for the balloons or bamboo, so I made a template myself for both. I colored the bamboo with Ranger's glossy accents; the balloons I cut out and covered with paper.

The background on the "Congratulations" card is hand made with left over papers from the project. I always like to make papers on tags at the end of every project with the scraps, so nothing goes to waste (and I don't feel guilty)! I almost always like the results. I really had fun doing this and I love every card. I think I'll be doing more sticker challenges in the future.

Resources:
Everyday Stickers from EK Success
Colorbok textured cardstock
Studio G pink paper pack
DCWV Paperstack - Citrus Matstack
Hampton Art - Celebrate Life Stamps
Spellbinders A2 Matting Basics
Spellbinders Pierced Rectangle (as seen in my last post)
Colorbok pigment ink
Recollections Detailed Embossing powder
Rangers Glossy accents

The original sticker sheet!


A peak inside - plenty of room to write!

Inside variation with hand colored bamboo. 


More inside variations


Wednesday, July 22, 2015

Christmas in July - Holiday Window Paper Card

Posted by Vicki at Wednesday, July 22, 2015 0 comments
Hello! Long time no post. I've been pretty busy lately, but I recently went on vacation for a week and had the chance to do some extra crafting, and get some posts ready - so look out for more updates soon!

I have seen so many wonderful tutorials on Youtube using this window die cut, so I thought I would give it a try - of course I had to add a cat! I really enjoyed making these and I can't wait to hand them out in a few months.

Resources:
Small Window - Poppy Stamps
Cat - iostamps
Martha Stewart punches (branch & present)
Tim Holtz distress ink

I also used Spellbinders Celebrations by Richard Garay for the pierced rectangles - they were the only pierced dies I could really afford, so I have been using them a lot lately!


 The inside I kept simple with some glitter embossing.

Monday, March 30, 2015

Matchbox DIY Jewelry Box Gift

Posted by Vicki at Monday, March 30, 2015 0 comments


I had a lot of fun making this little dresser for one of my friend's birthdays. I looked at a lot of Youtube tutorials before making this. I used standard matchboxes, Marion Smith's Alice in Wonderland 6x6 papers, and a miniature tea service set from Hobby Lobby. The hat I made myself from polymer clay.

As you can see from the pictures, the drawers are also lined with decorative paper and can be opened! My friend is planning on using this to hold her earrings and other small jewelry. So cute I need one for myself!


View from the back.

DIY Upcycle Craft Desk Organizer

Posted by Vicki at Monday, March 30, 2015 0 comments


My daughter and I both needed some extra space on our craft desks, so I decided to see what I could come up with for new organizers! I gathered some recycled cans and toilet paper rolls, added some Graphic 45 papers (as always! Love them!) and voila! Pictured here is my daughter's organizer with all of her polymer clay and miniature making tools.


Saturday, February 21, 2015

Modified Paper Bag - Baby Boy

Posted by Vicki at Saturday, February 21, 2015 1 comments


This album was made with American Crafts' Special Delivery papers that I found on sale at Michaels, as well as some of the Paper Studio's Baby Boy 8x8 collection from Hobby Lobby.

I call this a 'modified' paper bag because I wanted to make a full paper bag album with at least 6 pages. However, I ran out of time so I settled with making an album with a little bit of everything in it! I loved making this for one a friend at work, not only because it was fun to do something cute and baby themed - but because making something that was quick, cute, and would hold a lot of pictures was pretty challenging!

Scroll down for some more details, and don't forget to follow me on Pinterest!

Also, my daughter has started making miniatures for dollhouses, so if you're interested in that, you can check out her Tumblr!


Plenty of room for pictures.


Fold outs too!


Lots of pockets and tags.


Details on some of the journaling cards.

The back!


Jubilee Crafts Template by Ipietoon Blogger Template | Gift Idea